Posts tonen met het label tips. Alle posts tonen

dinsdag 22 juni 2010

Scaling your composition

Hi everyone, a quick point raised by Doris. She asked me why her animation when exported is not sharp. Looking at her .fla I think this is the problem:


This is the overview of her stage in Flash at 100%, that is 640x480 pixels. My first impression is that the girl and the windows (with fish swimming behind) of the main building have jagged lines making it look not good.

Then I zoom in:
And opla'! the girl and the windows are now nice and sharp. This happens when big bitmaps, jpgs, are imported in Flash and then scaled down too much to fit your composition. My solution would be: make a .jpg of of the girl (so you can keep your nice textures) but make the outlines in Illustrator.
You can then import your vector lines, you can just copy-paste from Illustrator directly into Flash, and separately import your jpg. In Flash, put the line on top of the .jpg, and convert them both, F8, into one graphic symbol, that you can reuse in your scenes.
Doris, hope it helps, thanks for your question and veel succes!

Is also a good idea to do a test and see how thin your lines are when scaled down in Flash. Sometimes you have to thicken the line a bit to make the line more fluent.
maandag 21 juni 2010


Hi everyone, hope you are all 'lekker bezig', nice at work, on your animated projects. I received an SOS email from Benine regarding problems with a walkcycle animation she was working on.
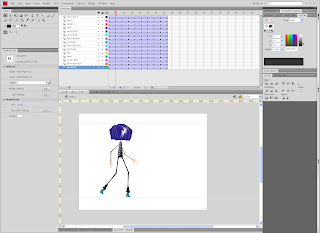
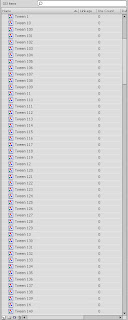
I immediately saw the problem: all of her nice graphics imported from Illustrator have been put on the timeline but she did not turn them into a graphic symbol by pressing the shortcut F8. As a result she has an endless list of 'Tweens' in her library, see above. Ouch.

This can be very time consuming to rectify because she had nicely prepared her walk positions and only at the moment of converting to motion tweens, did she realised that her animation was not working.

So, here are a couple of tips to make sure you don't waist your precious time and get the results you are aiming for:
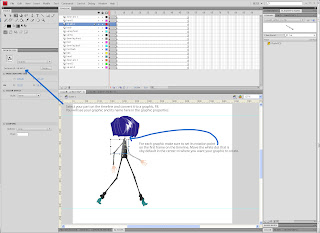
1) once you have all your body parts in separate layers, 1 graphic per layer, convert each one of them into a graphic, and name it.


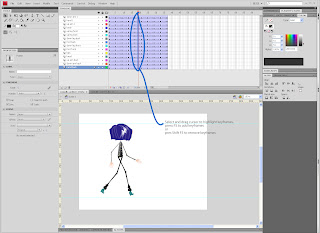
Once you have converted them all into graphic symbols select with your cursor on the timeline your keyframe and alt + drag your keyframes, or right click and select 'copy keyframes' and 'paste keyframes' to the next position.
Once all of your keyframes are in the right position on the timeline, slect your keyframes with the cursor and right click 'create classic tweens'.

If you need to shorten or lengthen your animation, select with the cursor in between keyframes and press F5, add keyframes, or Shift F5, to remove keyframes. Want to add an extra keyframe? press F6. Want to remove a keyframe, right click the keyframe on the timeline and select 'Clear keyframe. Want to insert an empty keyframe on the timeline, select your keyframe and press F7.

Any questions? you know where to find me! :)

Benine, here you can find your flash file that I adjusted, hope you don't mind sharing your questions with the group!

maandag 14 december 2009

Photoshop brushes

When you scan your line drawings and prepare each element, background, body elements, etc, you will most likely have to 'clean' your drawings, that is separate elements, arms, legs, face, etc in different layers. It is then useful to use brushes in photoshop to 'retouch' your line drawing. Here is a selection of brushes, sprays, and pencil brushes that can help you replicate the feeling of a 'real' pencil'. In particular the 'Nagel' series included does a good job of making pencil marks...:) you can download them here.